

/bridge(also/relay) - powered by Relay. The default, fast route for moving tokens between chains. This is what the Main Menu ↔️ Bridge button opens./debridge- powered by deBridge. An alternative route that supports backing tokens (stablecoins and other major assets) on top of the native asset./private- powered by Houdini Swap. The privacy-focused route that unlinks the sending and receiving addresses.
/bridge, /relay and /debridge are non-private bridges. Both show a note pointing you to /private if you want a private option instead./bridge and /relay - Fast Cross-Chain Swaps (Relay)
Send /bridge or /relay in your DM with the bot, or tap ↔️ Bridge in the Main Menu, to open the Relay panel. Both commands open the same menu. By default the panel starts with Solana as the sending chain and Robinhood as the receiving chain, but you can change either side.
From the panel you set:
- The sending chain and token.
- The receiving chain and token.
- The amount, once you tap 🧾 Get Quote.
- The receiving wallet.
If you paste a recipient address that doesn’t match the destination chain, the bot replies: “⚠️ The recipient address is invalid for the selected destination chain.” Enter a valid address for that chain to continue.
/debridge - Cross-Chain Swaps (deBridge)
Send /debridge to open the deBridge panel. It works the same way as the Relay panel: pick the sending chain and token, the receiving chain and token, the amount, and the receiving wallet, then tap 🧾 Get Quote followed by Bridge Now.
On deBridge you can send more than the chain’s native coin. The token picker offers each chain’s native asset plus its supported backing tokens (stablecoins and other major assets Maestro knows for that chain), so you can bridge those directly.
The deBridge quote breaks the cost down into Bridge Fees, Operating Expenses, and an approximate gas fee, so you can see exactly what the transfer costs before you commit.
/private - Private Cross-Chain Swaps (Houdini)
Send /private in your DM with the bot to open the Houdini Swap panel shown below. Unlike the other routes, Houdini orders route through a one-time deposit address, so the originating wallet and the receiving wallet cannot be linked on-chain by an outside observer.
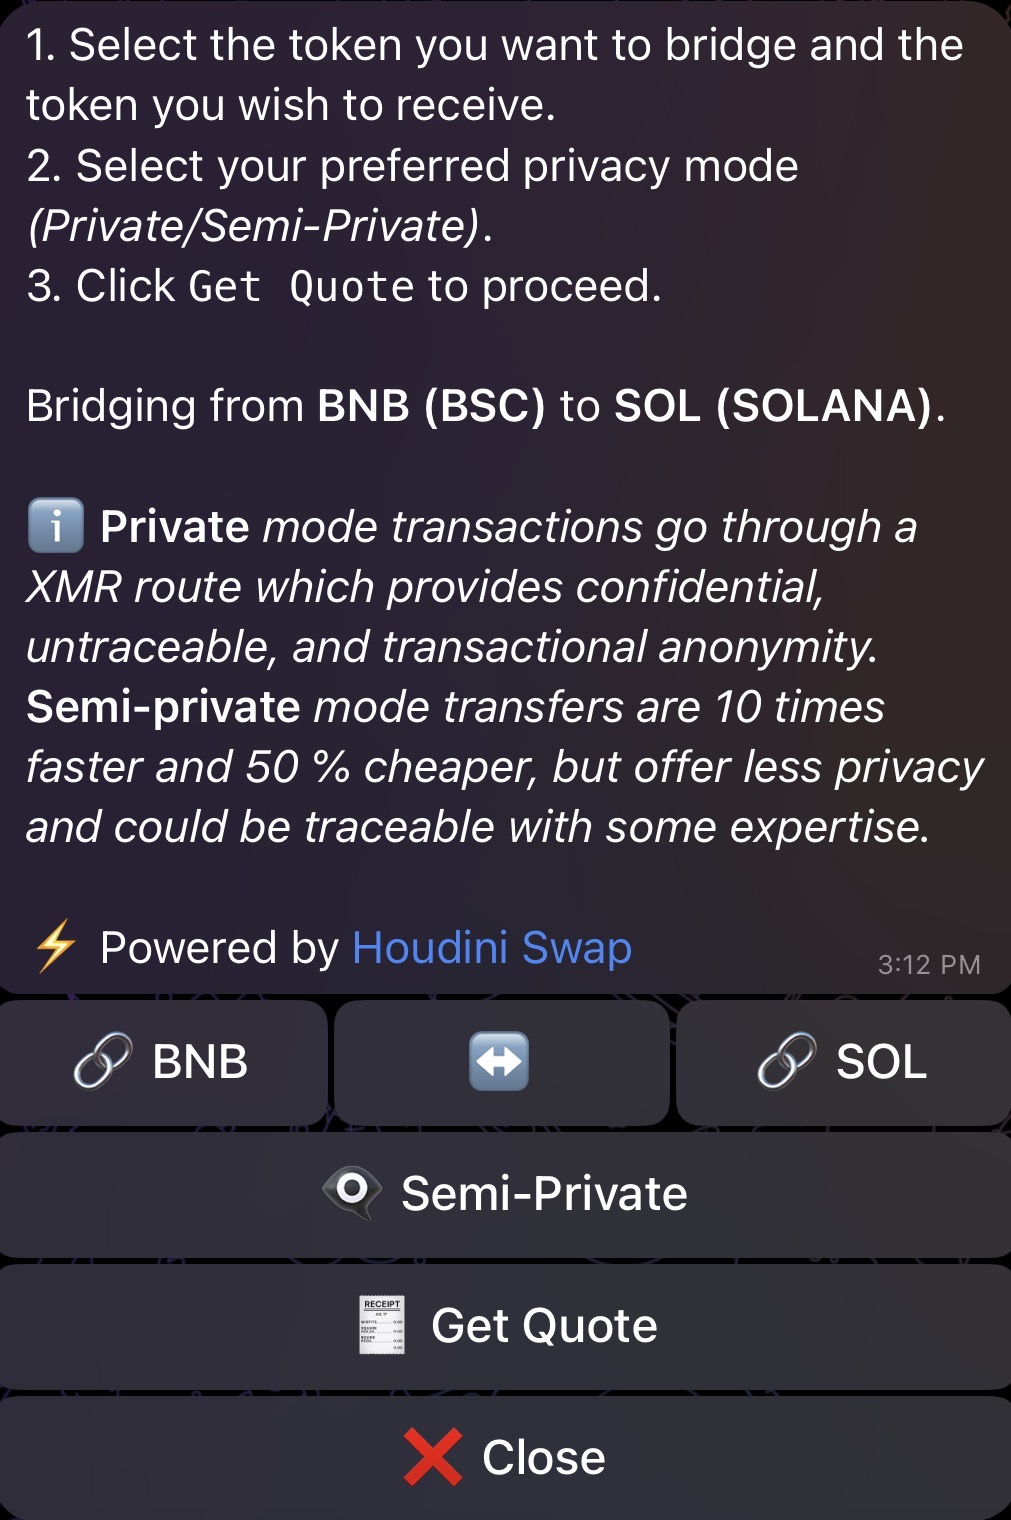
Houdini Swap Panel
Step 1: Select Chain and Token
The first step is to select the chain and token both on the sending and receiving ends. For example, the image above indicates that we will be sending BNB on BSC and, in return, we would like to receive SOL on Solana. To change this default configuration, simply click on ”🔗 BNB” and the bot will display a list of chains from which you need to select the target chain that you want to bridge, send or swap from, as shown below: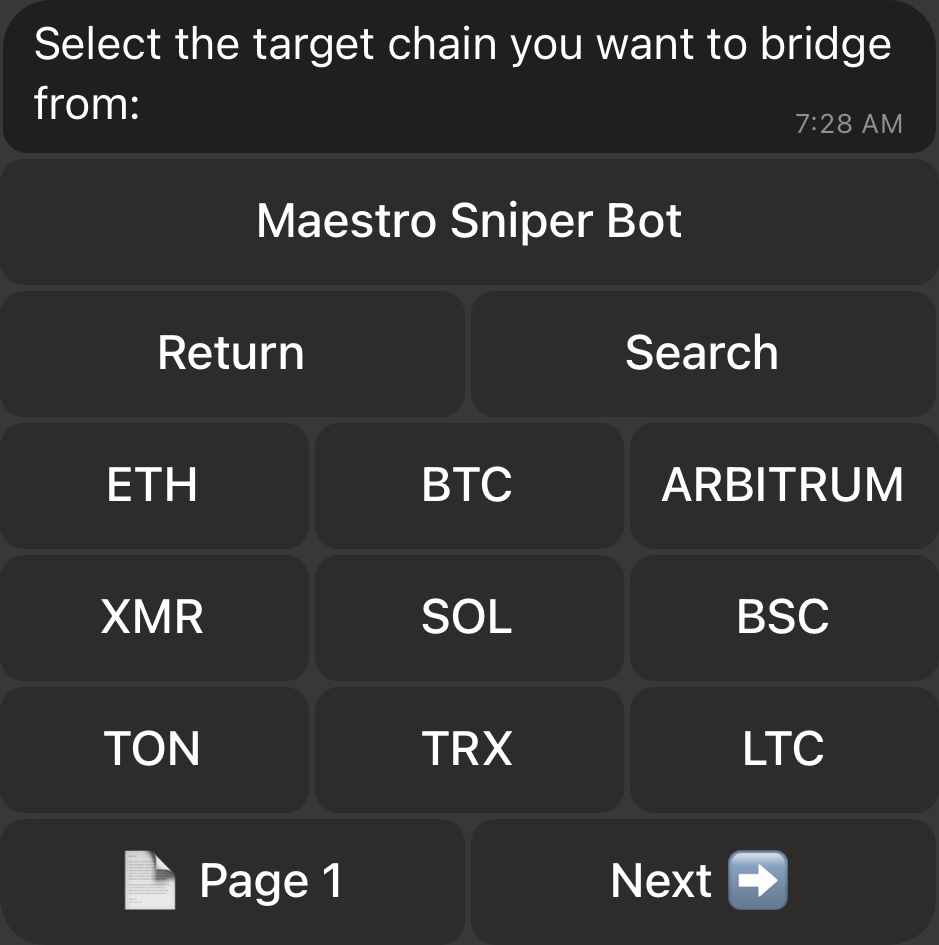
Selecting the Chain
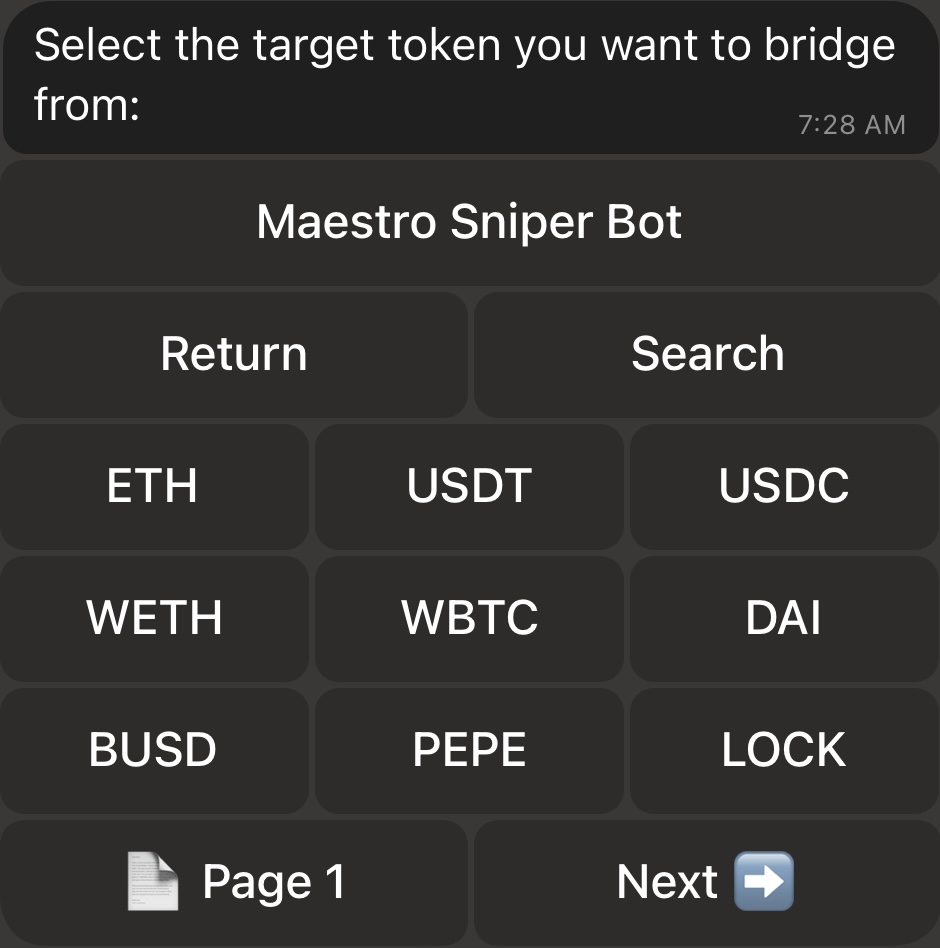
Selecting the Token
Step 2: Select Privacy Mode
The following step is to specify the Privacy Mode of your order. If you click on ”👁🗨 Semi-Private”, it will turn to ”👁🗨 Private”.- Private: Provides transactional anonymity. In other terms, you will have exclusive knowledge of the originating wallet address and the recipient address since you select both, but this information will not be identifiable by the receiver nor by external parties. Note that it is required to select Private Mode if you’re sending AND receiving the same token on the same chain.
- Semi-Private: Provides a practical blend of privacy and efficiency by offering an enhanced privacy when compared to regular transactions, but they are not completely anonymous and can potentially be traced back to the originating wallet address with some technical expertise. However, Semi-Private transactions are about 10 times faster than Private ones and cost approximately 50% less.
Step 3: Get Quote
Now that your order details are set, click on 🧾 Get Quote, and the bot will prompt you to insert the amount of tokens that you want to send, swap or bridge. Please note that there is a minimum acceptable amount that will be displayed to you if your inserted amount was too low. With the amount set, the bot will display a quotation that shows how many tokens you’ll be approximately receiving in return for the amount that you’re sending. An example quote is show below: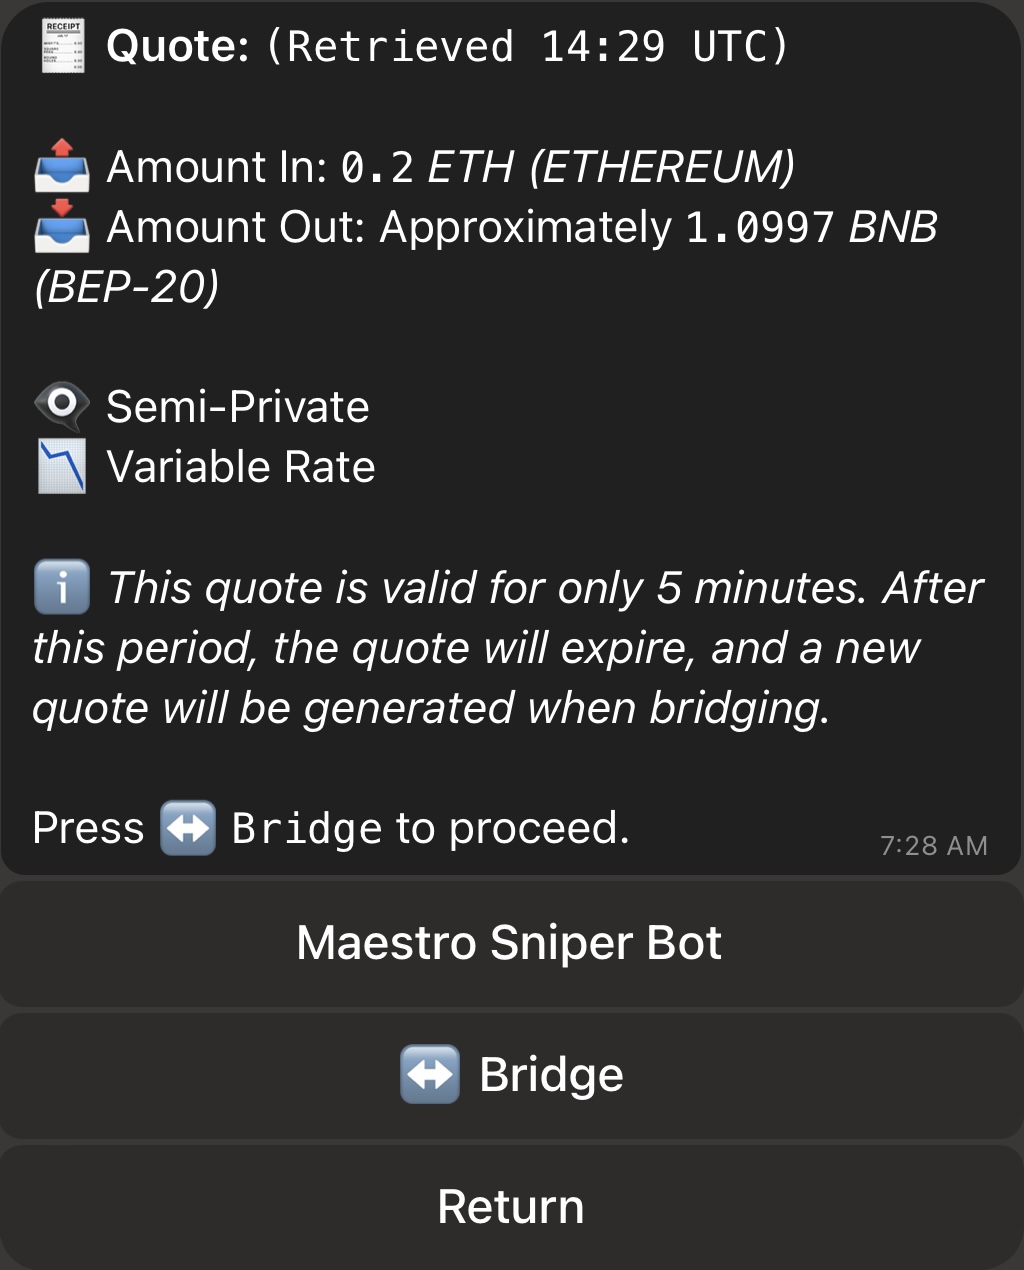
Example Quote
Step 4: Specify the Receiving Wallet
After clicking on ”⇔ Bridge” for a valid quote, the bot will ask you for the address of the wallet that will be receiving the tokens. In case the receiving chain is one that Maestro supports and you have wallets connected on it, the bot will also display these wallets for you to select if you wish to send, swap or bridge to one of your connected wallets, as shown below: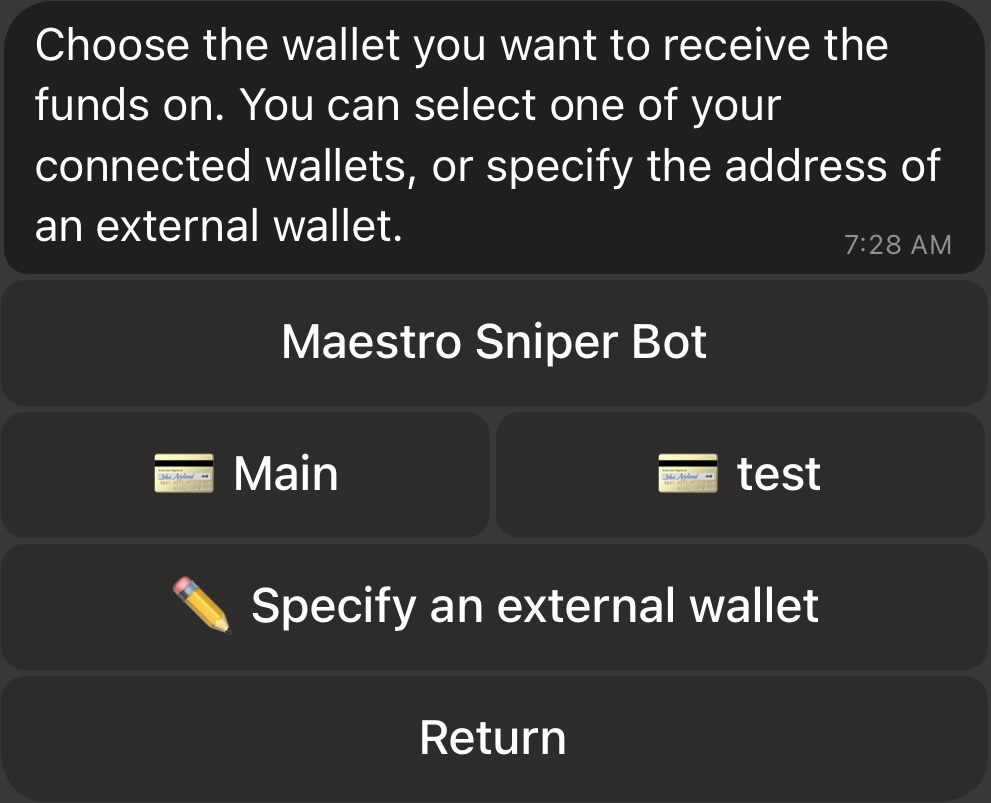
Selecting the Receiving Wallet
Step 5: Initiate the Transfer
Now that you’ve selected the receiving wallet, the bot will create your Houdini order. An example is shown in the image below. The Houdini ID of your order will also be shown towards the end of the message.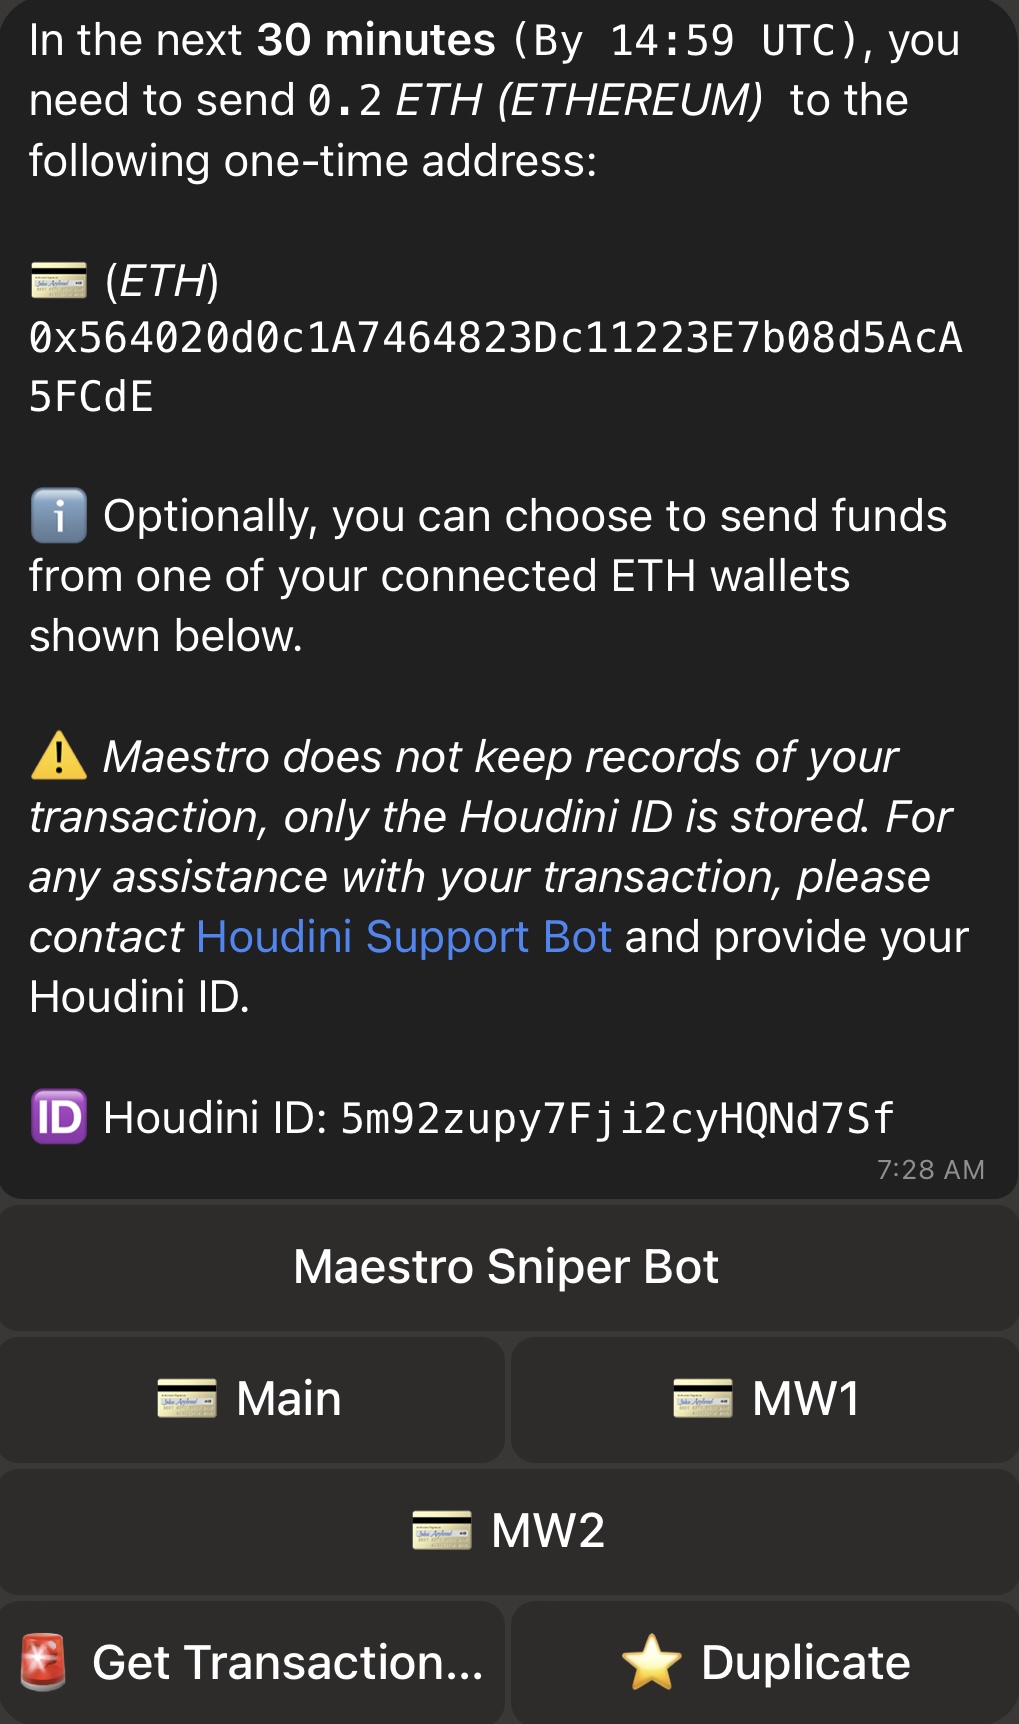
Example of a Houdini Order